Launching on Ora
Wallet Funding
Choose how many wallets buy your supply and how Ora funds them before you launch.
Funding your wallets
Section titled “Funding your wallets”On the Wallets step, you set up the wallets that will buy your supply: how many to use, how much each one holds, and how they're funded. Funding starts when you create your token.
Wallet settings
Section titled “Wallet settings”Choose how many wallets to launch with, using the Recommended Wallet Number or a Custom Number.
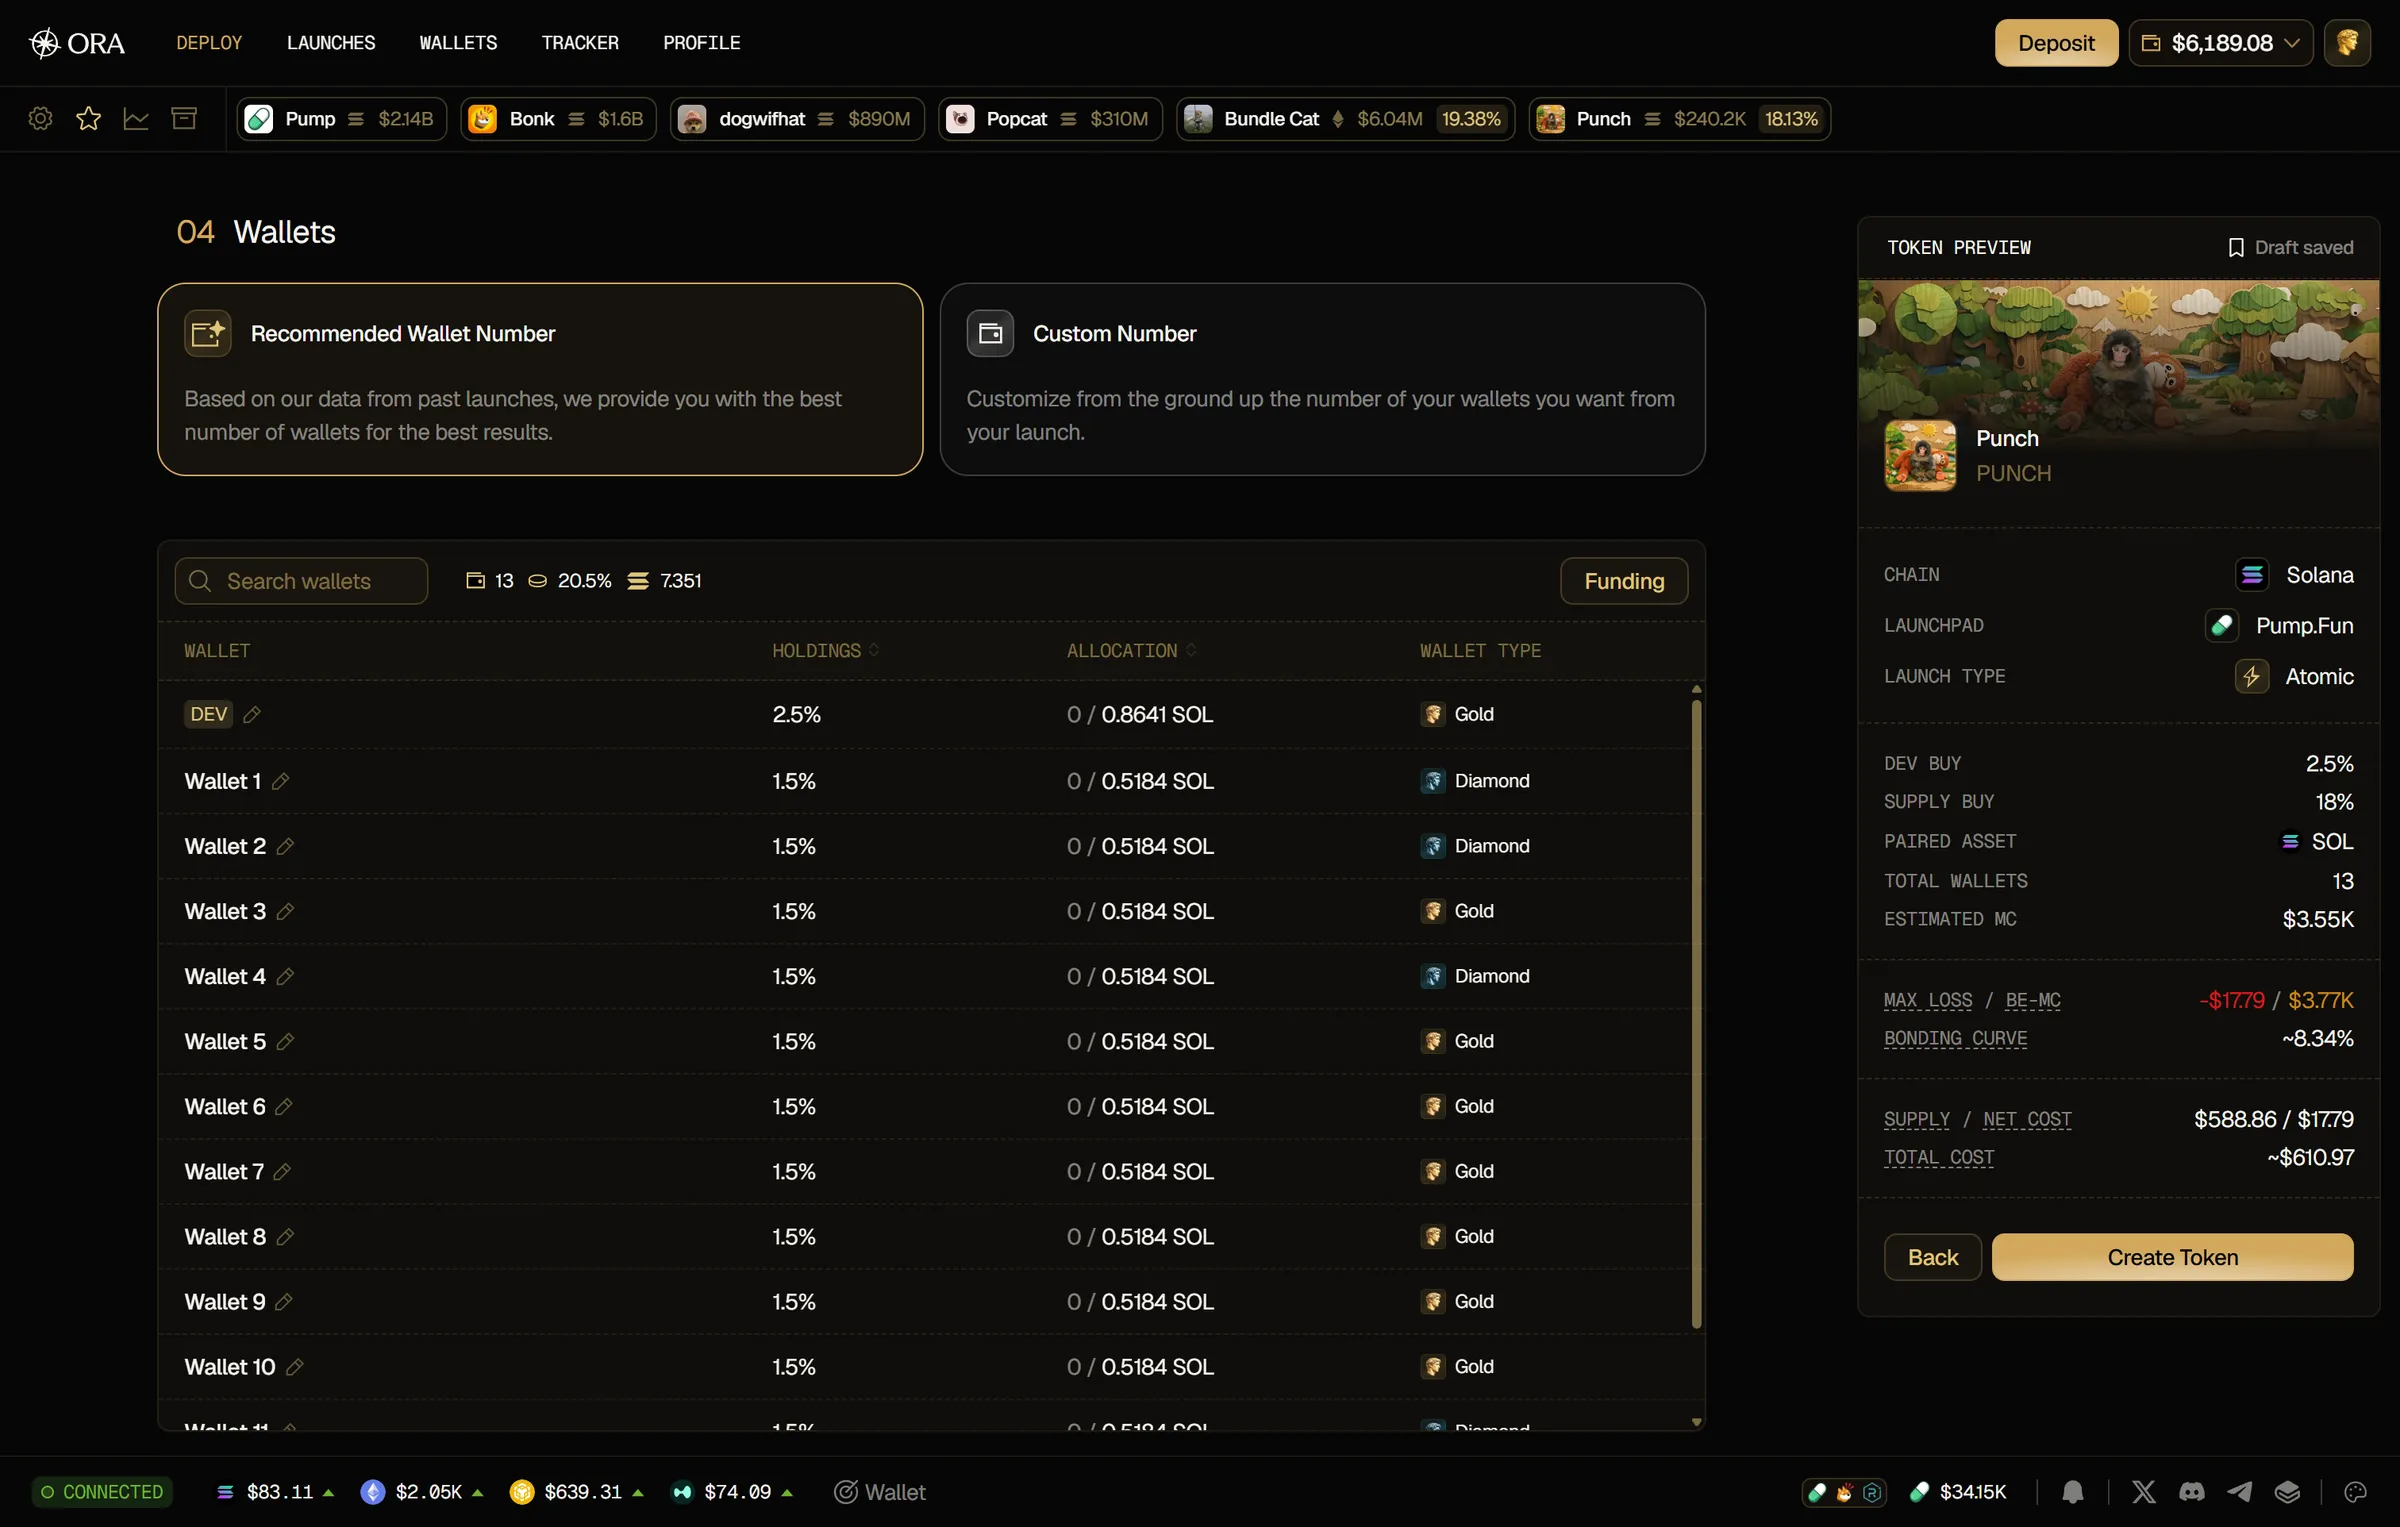
- Recommended Wallet Number: based on data from past launches, Ora gives you the best number of wallets for the best results, with the supply already split between them. When it can, Ora uses aged wallets for them: the ones you already own first, then wallets from the Marketplace. Their tier, Gold or Diamond, shows in the Wallet Type column.
- Custom Number: full control over your setup. Add or remove wallets and set how much each one holds.
The table lists your wallets with their Wallet, Holdings, Allocation and Wallet Type. In Custom Number, it also has tick boxes and an Actions column. Your dev wallet is always part of the launch.
- In both modes, you can rename a wallet.
- In Custom Number, you can also untick wallets, edit a wallet's Holdings (Ora rebalances the others) and delete wallets.
The holdings of your selected wallets must add up to your Supply Buy % before you can create your token.
Funding type
Section titled “Funding type”Click Funding above the wallets table to choose how your wallets are funded, then click Save.
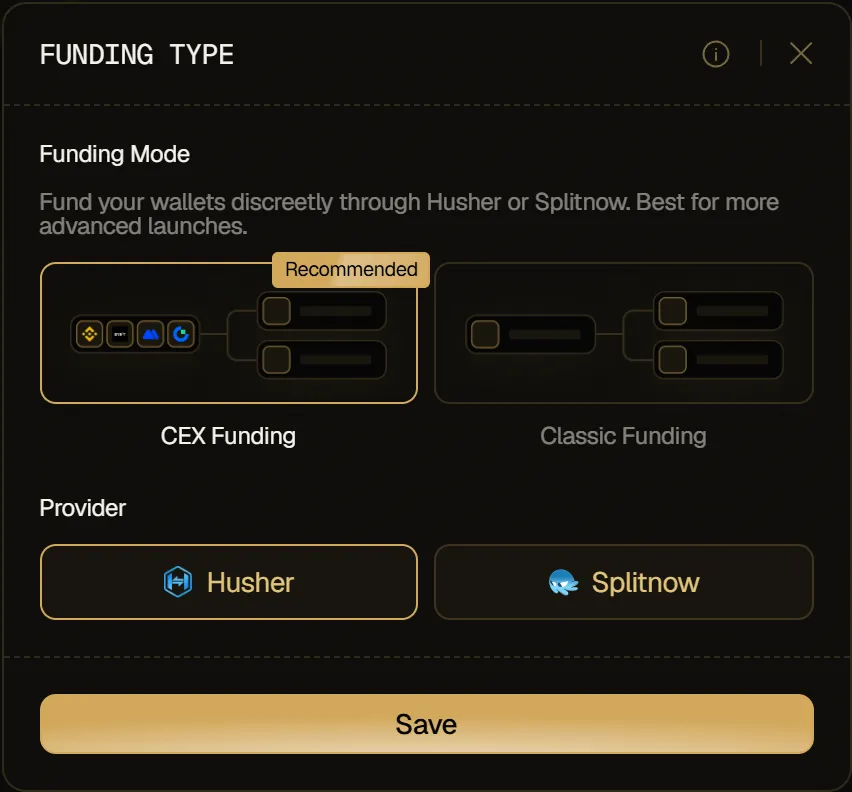
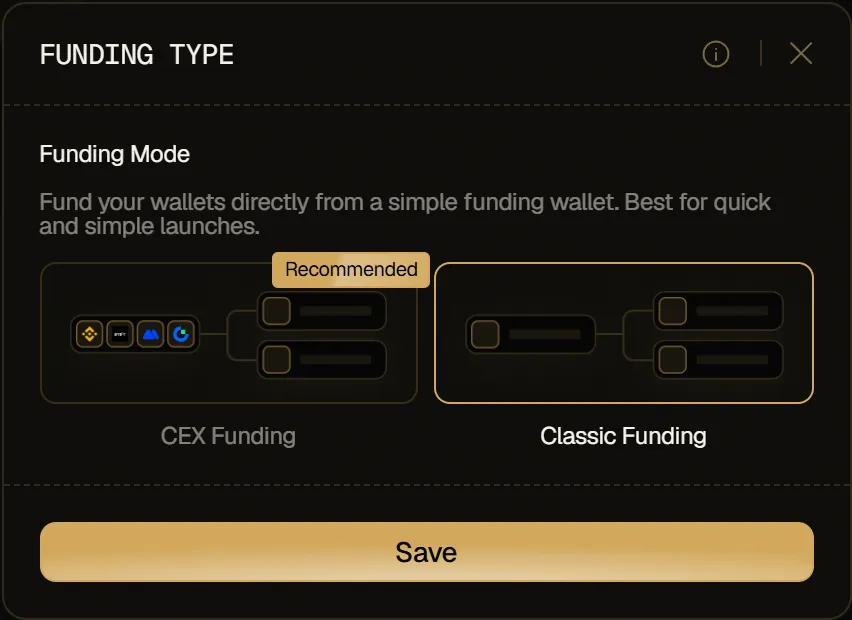
- CEX Funding on Solana, Private Funding on Robinhood: fund your wallets discreetly through a provider, so the on-chain trail doesn't link your wallet to your launch wallets. Best for more advanced launches.
- Classic Funding: fund your wallets directly from a single funding wallet. Best for quick and simple launches.
CEX or Private Funding is marked Recommended, and new launches start on it with Husher.
Funding providers
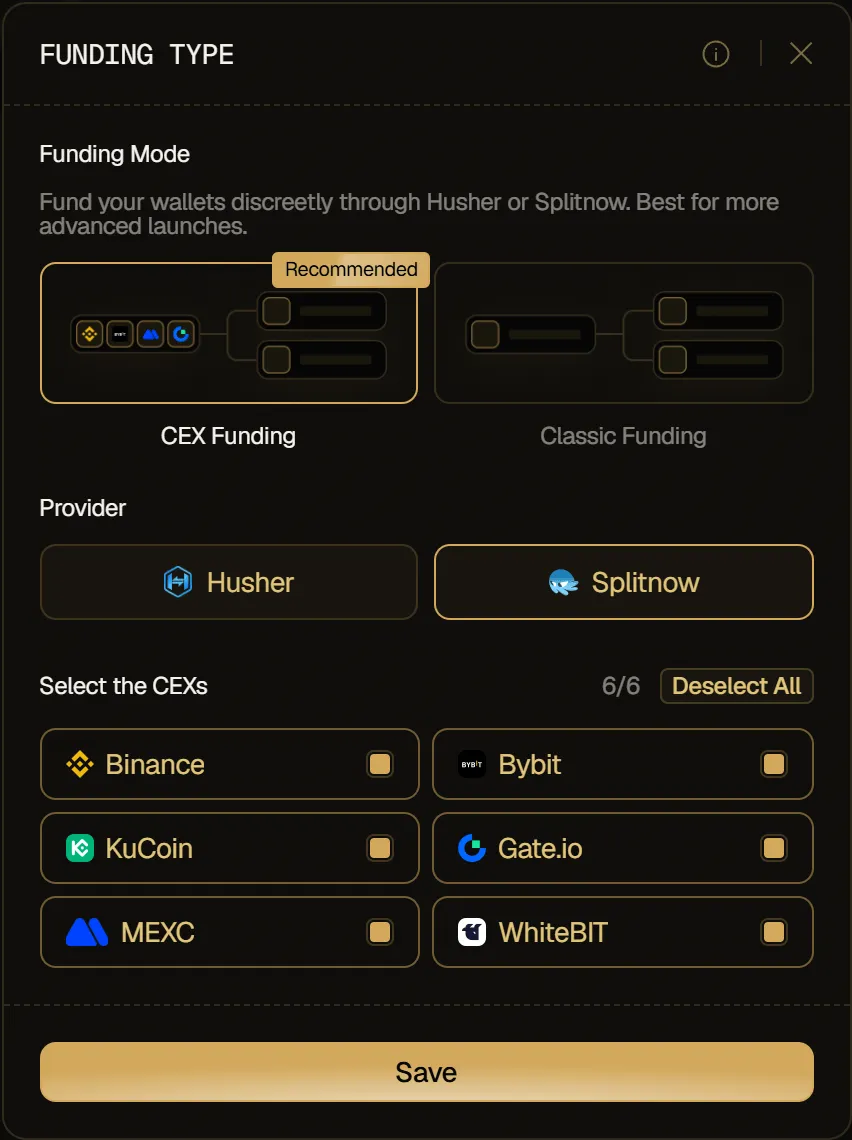
Section titled “Funding providers”With CEX or Private Funding selected, choose who routes the funds under Provider:
- Husher (Solana and Robinhood): the default provider. It routes the deposit itself, so there's no exchange to pick. On Robinhood, it's the only provider, so it's selected automatically.
- Splitnow (Solana only): it routes the funds through exchanges. Under Select the CEXs, tick the ones to use among Binance, Bybit, KuCoin, Gate.io, MEXC and WhiteBIT. They're all ticked by default: Deselect All clears the list and Select All ticks them all again.
Learn more about Husher.
Adding wallets
Section titled “Adding wallets”With Custom Number selected:
- Click Add above the wallets table. While the table is still empty, you can also click Add wallets in it.
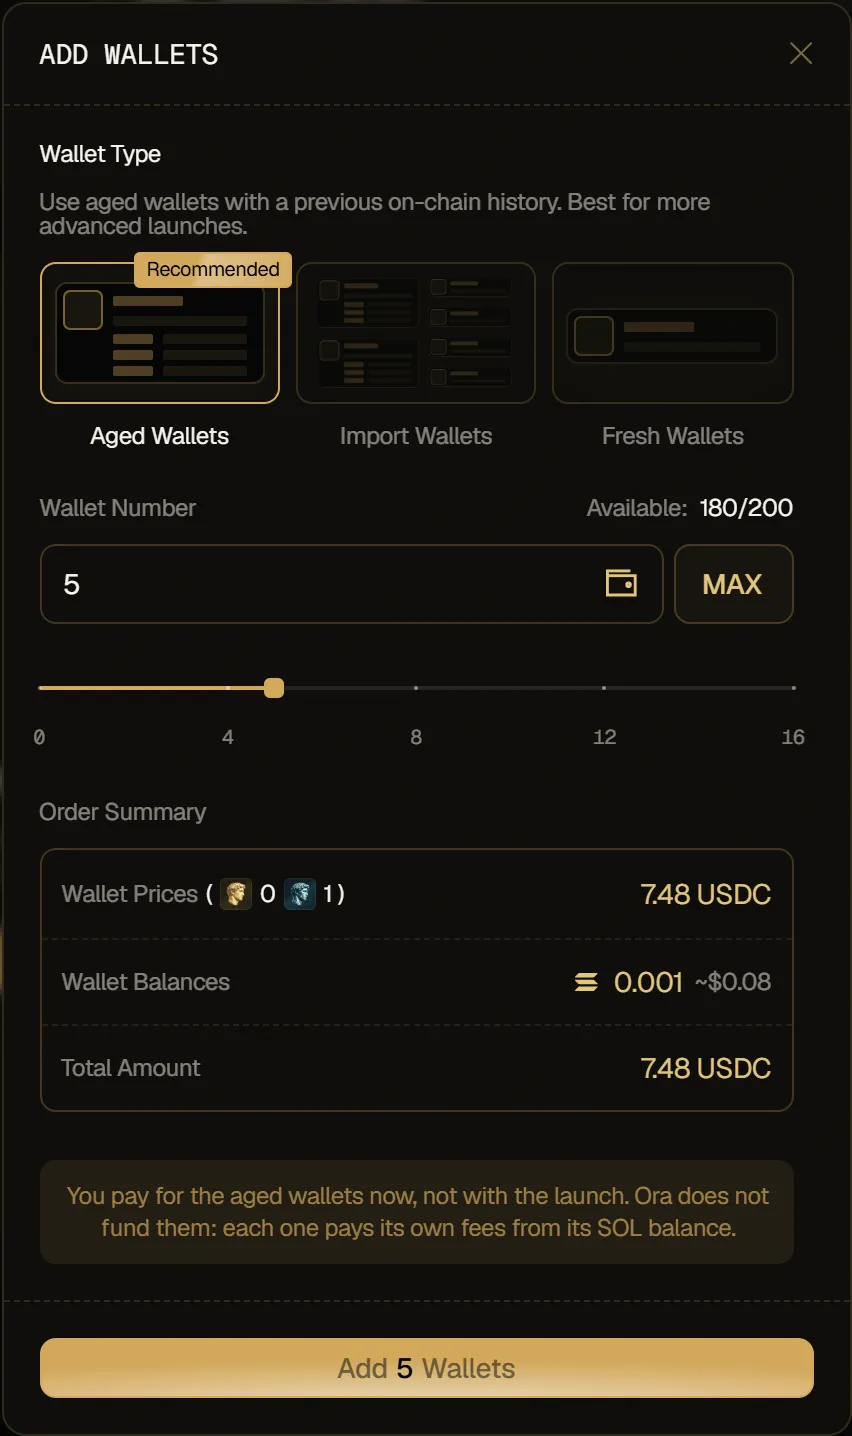
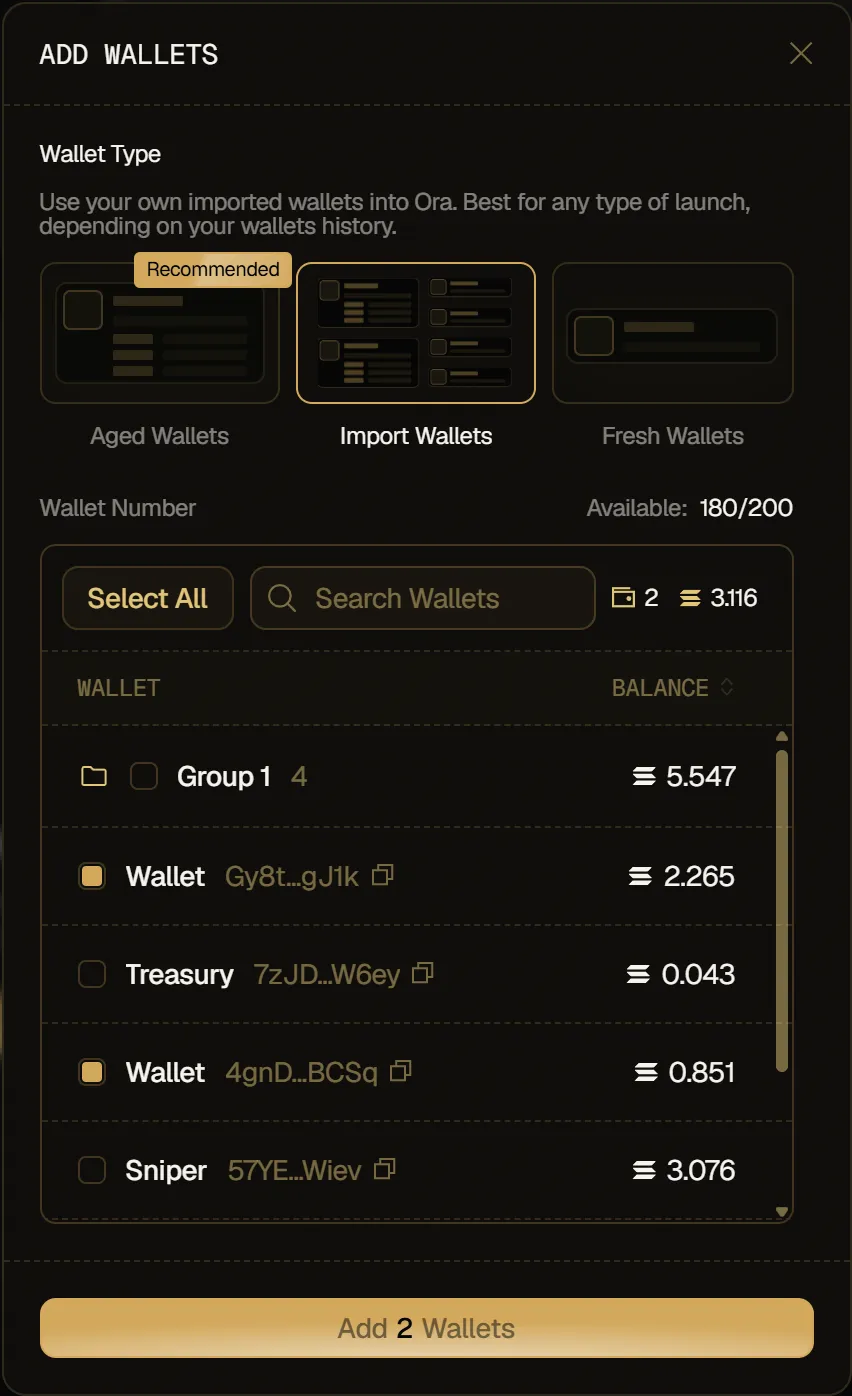
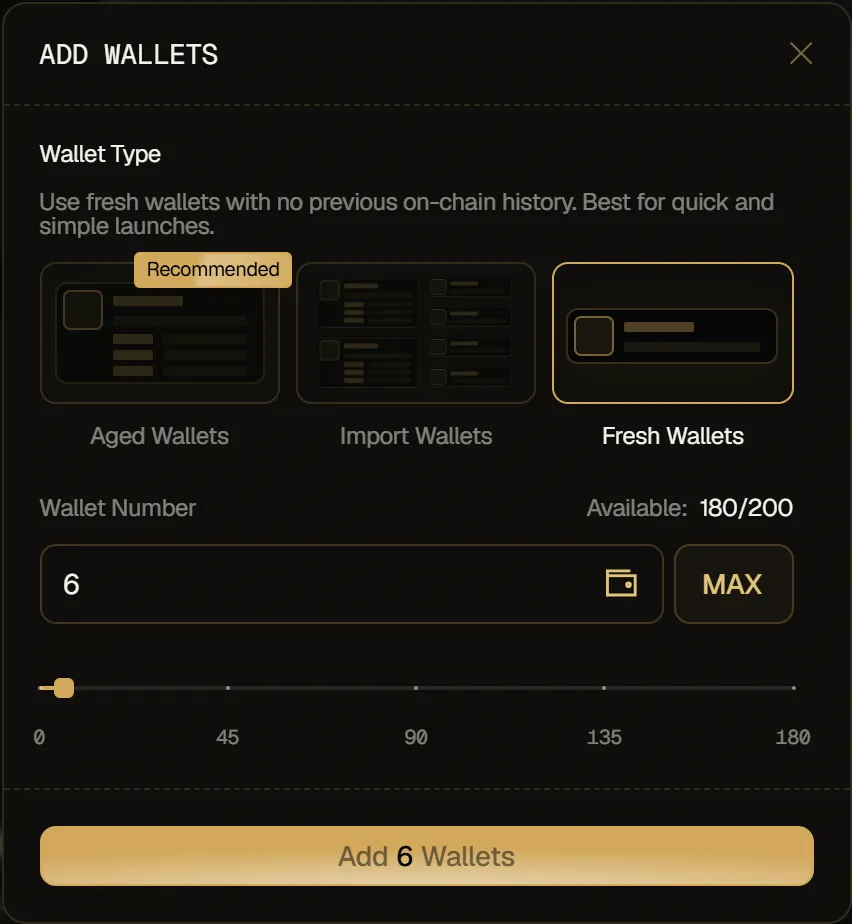
- In Add wallets, choose a Wallet Type: Aged Wallets, Import Wallets or Fresh Wallets.
- With Aged Wallets or Fresh Wallets, enter the Wallet Number, or use MAX or the slider. With Import Wallets, tick the wallets to add in the list of your imported wallets, using Search Wallets to find them.
- Click Add N Wallets.
The number of wallets you can add depends on your launch. When Add is disabled, hover it to see why: This launch already uses the maximum of N wallets. or Raise the Supply Buy % to add more wallets.
Wallet type
Section titled “Wallet type”In the Add wallets window, choose the wallets your launch uses under Wallet Type:
- Aged Wallets: wallets with an on-chain history, from the Marketplace. It's the Recommended type and the one selected when the window opens. You pay for aged wallets when you add them, not with the launch, and Ora doesn't fund them: each one pays its own fees from its own balance.
- Import Wallets: your own wallets imported into Ora.
- Fresh Wallets: new wallets Ora creates for your launch, with no previous on-chain history.
You can also use one of your own wallets as the dev wallet. See Import Wallets.
Paying for funding
Section titled “Paying for funding”Funding is paid from your Ora balance, in dollars, whichever chain the launch is on. The Token Preview shows the Total Cost, the total to fund across your wallets, leaving out the wallets you already own. Only the Net Cost is actually spent, the rest comes back when you sell.
If your balance is too low, the Create token confirmation tells you how much you need.